DIY Photo Gifts for Kids: 6 Easy Ideas
There’s just a few weeks until Christmas. I’m not sure where the time went! Anyway, my family, especially my girls’ grandparents, always want pictures of my kids for Christmas. Plus, the girls L-O-V-E to make presents. So, why not combine the two into some fabulous photo gifts that the kids can make?
After deciding to make photo gifts with the kids, I started thinking of some simple crafts that they could do with me that were…CHEAP…EASY…and QUICK to make.
We needed to make a bunch of gifts, so I couldn’t sink too much time or money into something elaborate. Plus, being a busy homeschooling, teaching, and home mama, I don’t exactly have a ton of spare time to craft. So, simple was essential. (#KeepItSimple #NoTimeForThat)
Keeping that in mind, I came up with seven easy DIY photo gifts kids can make. Here are the gifts we made.

First, we made these adorable bookmarks. Being a family of readers, the girls are going to give these to my husband. He’ll love them!
To make these, you’ll need to take pictures of the kids posed like they are hanging from a rope. Print the pictures out onto thick card stock. Laminate them and cut them out again. Then, use a hole punch to punch a hole near their hands.
Next, make a tassel. First, wrap some embroidery floss around the short side of an index card about 20 times. Slide a piece of embroidery floss that’s about 8 inches long through the bottom under all of the wrapped floss. Tie the 8-inch piece around the wrapped floss in a knot. Then cut the wrapped floss at the top of the card to create a tassel. Thread one piece of the 8-inch floss through the hole you punched and tie it with a knot to the other side.

The next gift the girls made was these popsicle stick photo frames. We glued magnets onto the back so they could stick to the fridge to display precious family photos. I’ve requested these for my own Christmas gift.
We covered some thick popsicle sticks with washi tape to make them extra cute. Next, we set two sticks about 3 inches apart so they were parallel to each other. Then, we glued several sticks perpendicularly onto them. We used some E6000 glue to attach a few magnets to the back and added a binder clip to the top. Viola…a magnetic picture frame!

Next, we made some coasters. They came out perfectly. These will be going to the grandparents. These were a lot of fun to make and very easy. I followed this tutorial, which made it super simple to do.

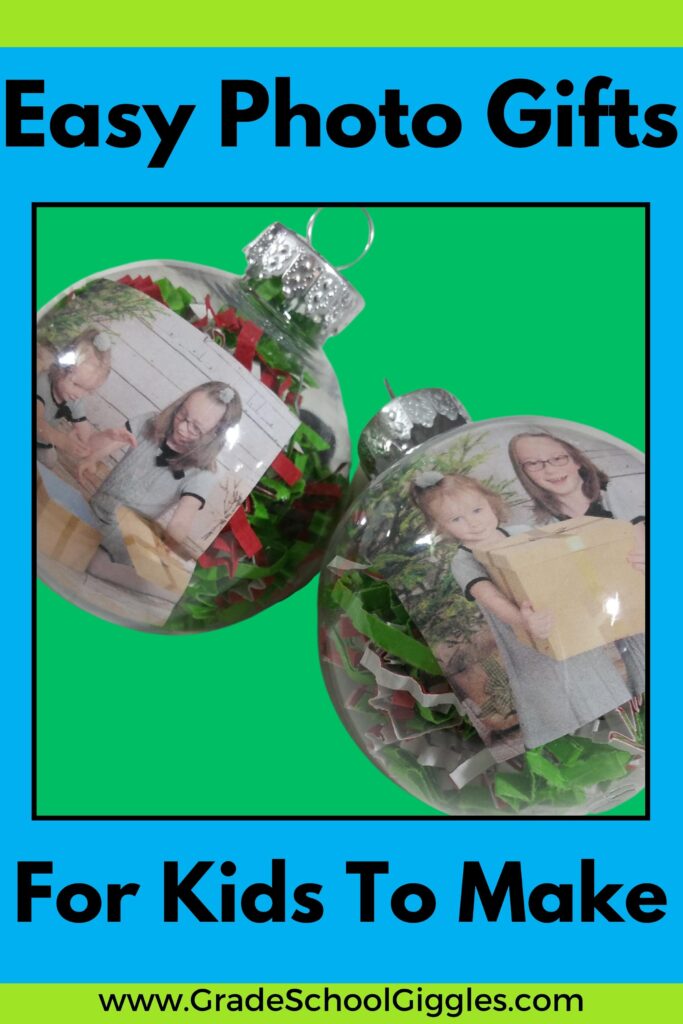
Then, we made two different types of ornaments. The first was super easy. We just taped a photo into a clear ball ornament and then filled it with some shredded paper. Easy peasy! #Can’tGetAnyEasier

The second type of ornament was a tad bit more involved, but they came out gorgeously! We just used some acrylic paint to paint some wooden cutouts from Micheals and then used Mod Podge to add the photos. I finished them off with a spray of sealer and then let the girls add some penguin stickers. So cute! I’m totally keeping these.

The final gift project was making photo magnets. I absolutely love these. We made a bunch. So, lots of family members will be getting some of these gems.
First, I printed some pictures of the girls out in fairly small sizes. Then, I gave the girls some flat-backed glass pebbles to trace onto the pictures. Once the pictures had been traced, the girls used some Mod Podge to glue the pictures onto the pebbles. Then, I used E600 glue to attach magnets to the back.
All of the gifts came out wonderfully, and the girls were so excited to put their homemade gifts under the tree. Christmas will be here soon, and I can’t wait!
